Script structure
The Script structure panel is a tool for navigating and managing the script. To open the panel, click in the top left corner of the canvas.

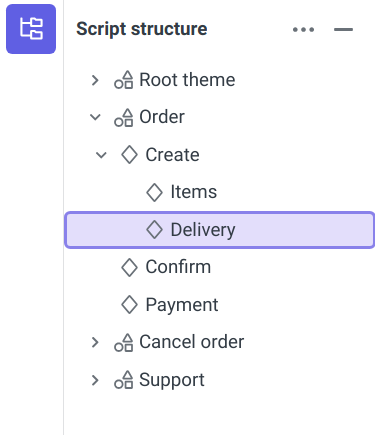
The panel displays the hierarchy of script elements: themes and states. By default, all elements in the list are collapsed:
- To expand a theme or state, click to the left of the element name.
- To expand all items at once, in the top right corner of the panel, click and select Expand all.
- If you select a step on canvas, it will also be selected in the panel and all its parent elements will be expanded.
To navigate to a theme or state on the canvas, double-click the element.
tip
You can also browse the elements in the panel using keyboard.
Actions with themes and states
Using the panel, you can create, rename, and delete a theme or state.
Create theme
To create a theme:
- Right-click any element.
- Select Create → Theme.
- Enter a theme name and click Create theme.
The new theme will appear on the top script level.
Create state
- To create a state on the top level of a theme, right-click the theme and select Create → State.
- To create a state on the same level as another state, right-click the state and select Create → State.
- To create a nested state, right-click the state that will be the parent and select Create → Nested state.
Next, specify the name of the state and click Create state.
tip
When you create a state, you can also add a reaction block or action.
Rename element
To rename a state or a theme:
- Right-click the element.
- Select Rename.
- Enter a new name and click Save.
Delete element
To delete a state or a theme:
- Right-click the element.
- Select Delete and confirm deletion.